Friday, December 19, 2008

Apache virtual hosts (Done on F10)

This is about the name based virtual hosts using apache. I haven't tried ip-based virtual hosts. This is because of two reasons. (a) I do not have multiple IPs. (b) Even though it is possible to try this with private ips, it will only have only academic value and for a fact, I know that doing that will be really simple. (A simple soln: Run one apache per ip and set document root to any given directory)

To create a virtual host, go to the last line of your httpd.conf. You will see an example there. Just copy-n-paste the example and make the necessary changes. To create a virtual host, just do this much:

NameVirtualHost *:80


ServerAdmin webmaster@sarin.net.in
DocumentRoot /var/www/mydomain
ServerName mydomain.co.in
ErrorLog logs/mydomain-error_log
CustomLog logs/mydomain-access_log common


Now create the directory.
mkdir /var/www/mydomain
echo My homepage > /var/www/mydomain/index.html
Change the ownership of the directory
chown -R apache.apache /var/www/mydomain

Now, just restart httpd
service httpd restart

Note 1: You can create multiple virtual host entries by repeating ... block. (Also create directories with correct permission and restart service). "mydomain" & "mydomain.co.in" need to be replaced with your domain name.
Note 2: I have noticed that log file names cannot be same. They have to be different for different domains.

Thursday, December 18, 2008

Customizing BCM96338 (3)

Eventually I found some time to complete it.

We now know

1. How to enter the modem
2. What settings need to be made to forward a port

Now, we will see how to automate this.

Automating this is very simple. I used expect to do this job.

I can directly post all the scripts here. But they are too long and the same expect scripts might not work for someone else.

First you need to manually make the settings at the modem.
Then, just follow the steps below

1. autoexpect telnet 192.168.1.1
1.1 When you get the login prompt, login by giving the user-name and password.
1.2 At the prompt type "sh" and get a shell.
1.3 At the shell type "iptables -L -t nat"
1.4 Once you see the o/p, press "Ctrl-D", , 14
1.5 This will take you out of the modem
1.6 Auto expect would have now created a script to do this (script.exp)

2. Edit the script, set force_conservative 1, rename it to something else (poke.exp in my case)

3. Repeat step 1. At 1.3, instead of listing the table, enter the DNAT command (Eg. iptables -t nat -I PREROUTING -p tcp --dport 80 -j DNAT --to-destination 192.168.1.10)

4. Repeat step 2, save it in some other name (ipt.exp in my case)

5. Now extract the rule from the poke.exp and save it in a file. It will look like something like this,
DNAT tcp -- anywhere anywhere tcp dpt:www to:192.168.1.10
Save it to a file (grep)

6. It is time to create a script (monitor.sh). RUNDIR is where all your files will be kept.

#!/bin/bash

RUNDIR=/root/bin/bsnl
${RUNDIR}/poke.exp > ${RUNDIR}/op
grep -q -- "`cat ${RUNDIR}/grep`" ${RUNDIR}/op || ${RUNDIR}/ipt.exp

7. Now you can add this to your crontab using the command "crontab -e"
*/5 * * * * /root/bin/monitor.sh
(Save and quit)

It won't be complete if I don't mention about ddns. Get an account there. This modem has a ddns client. Once you enable this, you can access your machine using the name that you got from dyndns. (I have actually done this also using a script since I maintain my dns records at zoneedit.com. More about it in another post)
Wednesday, December 17, 2008

Making of a (SIP) call (1)

I am currently looking at the call flow in asterisk when a sip message reaches the client.

1. The i/o callback generates a sip request (struct sip_request) and then calls the handle_request_do function
2. The handle request function calls tje find_call function
3. The find call function find a call corresponding to the request with the help of callid
4. If the find call function cannot find the correspond call, it will check if the call can be created (Only some type of sip requests can create a call. For example, A 'BYE' cannot create a call)
5. If a call can be created, the same will be created.
6. If a call is found/created, the corresponding private structure is returned to the callee

Tuesday, December 2, 2008

F10

I got it installed eventually. But it did not start. In the evening, I went to install screen again, selected an upgrade and removed splash image from grub after mounting the bootable partition from the text console. In the upgrade selected not to install grub. Upgrade did nothing and restarted the m/c. I am not getting the graphical screen with Intel drivers. Just started X with vesa driver. Will do the R&D later.

F10 installation

I was downloading a few other items, so F10 happened just yesterday. I have started installation on my sister's computer using one of my old 80GB ATA hard drives. This is what I did.


(I already have dhcp, tftp and httpd running on my machine)
1. mount Fedora-10-i386-DVD.iso /mnt -o loop
2. cp /mnt/images/pxeboot/vmlinuz /tftpboot/F10InstKern
3. cp /mnt/images/pxeboot/initrd.img /tftpboot/F10InstInitrd
4. Edit pxeconfig and create an entry for F10 installation
LABEL F10Inst
KERNEL F10InstKernel
APPEND initrd=F10InstInitrd ip=:::::::dhcp admin
(I also made this default)
5. ln -s /mnt/ /var/www/html/f10

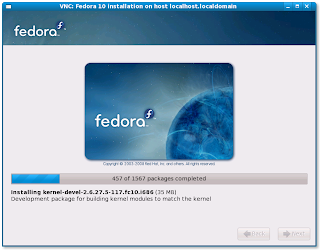
Just started the target machine and selected network boot. This started the installation. The installer could not start X. I chose to use vnc. A screen-shot is attached.